Monday, April 11, 2011

Empty tomb cookies

Easter Tomb Cookies
Ingredients / Items Needed:
Bible
1 cup whole pecans
1 large gallon zipper bag
Wooden spoon
1 teaspoon vinegar
3 egg whites
Pinch of salt
1 cup white sugar
Tape
Directions:
Preheat oven to 300 degrees.
We broke a spoon, be careful!
Activity: Put pecans in a Ziploc bag and let children beat them with a wooden spoon, to break them into small pieces.
Discussion: After Jesus was arrested, He was beaten by the Roman soldiers.
Read: John 19:1-3.
Activity: Let children smell vinegar. Add a teaspoon of vinegar to a mixing bowl.
Discussion: When Jesus was thirsty on the cross, he was given vinegar to drink.
Read: John 19:28,30
This is what her face looked like after she smelled it!
Activity: Add egg whites to vinegar.
DiscussionEggs represent life. Jesus gave His life to give us life.
Read: John 10:10-11

Activity
: Sprinkle a little salt into each child’s hand. Let them taste it and brush the rest into the bowl with the egg and vinegar.
Discussion: This represents the salty tears shed by Jesus’ followers, and the bitterness of our own sins.
Read: Luke 23:27
Activity: Add one cup of sugar.
Discussion: The sweetest part of the story is that Jesus died because He loves us. He wants us to know and belong to Him.
Read: Psalm 34:8
Activity: Beat with a mixer on high speed for 12-15 minutes or until stiff peaks are formed.
Discussion: The color white represents the purity in God’s eyes of those whose sins have been cleansed by Jesus.
Read: Isaiah 1:18
Activity: Fold in broken nuts. Line cookie sheet with waxed paper. Drop mixture by spoonfuls onto waxed paper.
Discussion: Each mound represents the rocky tomb where Jesus’ body was laid.
Read: Matthew 27:57-60
Activity: Place the cookie sheet in the oven, close the door and turn the oven OFF. Give each child a piece of tape and seal the oven door.
Discussion: Jesus’ tomb was sealed.
Read: Matthew 27:65-66
Activity: GO TO BED.
Discussion: You may feel sad that we had to leave the cookies in the oven overnight. Jesus’ followers were sad when the tomb was sealed.
Read: John 16:20
On Easter morning, open the oven and remove the cookies. Take a bite. Notice…the inside of the cookies are hollow!
On the first Easter Jesus’ followers were amazed to find the tomb open and empty.
Read: Matthew 28:1-9

Friday, April 8, 2011

Storing backdrops

HOW TO YOU HANG YOUR BACKDROPS? HOW DO YOU STORE YOU DROPS & FLOORS? Other Suggestions?

by Photo Prop Floors and Backdrops Fan Page on Friday, April 8, 2011 at 11:58pm
Customers have been sharing how they store their backdrop and floors as well as how they hang them (as well as other questions and suggestions).  I thought I would create a spot where everyone can share their methods in the comments or post links to their set ups.

I thought this would be a good way to share...


What I've received so far from our clients:

Katy Allen Atkinson:

Check this out...  I think this is the way I may go when I can afford to buy a few more backgrounds. It's a youtube video by silverlake photo.
__________________________________________________

Heidi Hope:

I'm going to nail two binder type artist clips to my wall and hang them from there (tomorrow actually!)

__________________________________________________

Kelly Wilk:

"Thought I would share how I hang my backdrops... I work from a home studio and have a removable curtain rod that I was attaching my backdrops to with heavy duty clamps from Home Depot...Wasn't too happy with this method because I found it left slight ripples on the backdrops so...I went to a local fabric shop and asked them for the card board tubing that they use for their fabric bolts.  They were more then happy to GIVE them to me (better to recycle then to throw them out!)  I then used a staple gun (with not too big of a staple and stapled the top of the back drop to the card board tube which is now easy to roll up and store plus it just slides on to my curtain rod so easily.  If I decide to use the backdrop as a floor, I just make sure the tube is to the side or away from the wall...I'm sure everyone has a method that works for them but so far, this has worked the best for me..."

__________________________________________________

Jolene Grove McDowell:

I go to the local hardware store and cut sections of wooden closet rods (about 1.5 inches in diameter) and about a foot longer than the drops. I then drill holes in each end so they slide down over top my backdrop stands. I go the expensive way and velcro them to the rods and then role them up on the rod for storage and transport. I have an extra rod that I use at the bottom to add a little weight to the piece on the floor. This is not the cheapest method, but it works for me. 
__________________________________________________

Mary Loomis Glynn: 

PVC piping makes awesome backdrop holders and easy take down and storage. You can look online for PVC photography back drop holders

__________________________________________________

Heather Guck Soskin:

I attached 2 curtain rods and differant heights to the wall in the studio, I then clamp the backdrops on when I'm using one. I store them in the tubes they were shipped in, with a picture of each backdrop on the outside of the tube for reference.
__________________________________________________

Annet Hammond: 

I went to my local fabric store and asked for empty tubes that the "home style" fabrics come on, and I roll my back drops on that, I have a manfrotto system for my seamless backdrop paper, and I purchased two individual brackets mounted those underneath and now I have room for 6 rolls at one time, the rest is stored in a closet, its not the cheapest way but it looks nice, clean,organized AND professional !

__________________________________________________

Virginia Powell:  

I just purchased an inexpensive peice of panel board (about 18 bucks), and had it cut to the size of my drops. My plan is to stand the panel board up and clamp it to my backdrop stand and then clamp the drop to the panel board so it is nice and tight. Another plus is that you can prop the panel board with drop attached up against a wall so your subject can lean on it for added use. I'll be trying it out this weekend, but I've done it with a piece of privacy fence outdoors and it worked very well.
__________________________________________________

Erin Noie 
I did a combo of Jolene and Heather's methods. Closet rod, wall brackets and velcro. I love it so far!!http://www.facebook.com/note.php?note_id=10150108188714838&ref=notif&notif_t=like

Update 1/23/11:  Erin just submitted this today:  http://www.facebook.com/notes/erin-noie/studio/10150166500669838 - more great info!!
__________________________________________________

Jenn Tuttle:


"So a few days ago I got my 16 new backdrops/ flooring!! WOOOHOOOO!!!
Once I got them all out… they CONSUMED my floor…. I had PILES of them LOL!!! So with my hubby we came up with a great idea… and since hes a welder this was going to be cake for him! WHEW… Im so glad hes such a handyman in times like this!!!

So here it is… my wall mount for my backdrops I got from photo prop floors and backdrops:  http://www.jenntuttle.com/?p=761#"

If you want one of your own email Jenn at:  Jenn@mejenn.com
$75 (shipping included)

Heather Fristick DeFranco

I know somewhere there was a conversation on here about how to store all your backdrops...I just opened a new studio and am using hooks made to hold garden hoses...I got them for $5 each at lowes and they work fantastic...here is a picture! If you are looking for a cheap way to store your backdrops, try this:  http://www.facebook.com/photo.php?fbid=522378109799&set=a.517817903489.2022895.187801109&ref=nf

__________________________________________________

QUESTION:  Jennifer Morais I have a question that maybe even a photog can answer for me. For the b/d's with the faux baseboard.... how do you get it to stay flush against the floor without it rolling up at the bottom?

ANSWERS:
PhotoProp Floors-Backdrops: This is what I do in my shoots:http://www.facebook.com/photo.php?pid=131618&l=9e0dd9c7fd&id=10000086238954.  Take a look at the mini clamps at the bottom of the drop. I use them to clamp the drop to the floor. Here is another pic: http://www.facebook.com/photo.php?pid=131617&l=cec4ded57f&id=100000862389541
Sabrina Birch Graves: you can use the backdrop w/ your own "real" floor as long as you use a good baseboard and clamp the backdrop to the baseboard. 
Tina Francisco: I clamp it to my backdrop stand leg or the tube it came in ;)
PhotoProp Floors-Backdrops: If you want to use your real floor and you have a printed backdrop - what I suggest is using a long piece of cardboard and clamping it to the back of the backdrop. That's what I've done before. :)

__________________________________________________


Please feel free to share your method in the comments below and I will add them here!  :)

April 7 2011

http://www.potterybarn.com/products/vintage-wood-pedestal/?pkey=ccake-stands

http://www.potterybarn.com/products/glass-pedestal-stand/?pkey=ccake-stands

http://www.potterybarn.com/products/glass-domes/?pkey=ccake-stands

Ky Swimholes

http://www.google.com/search?sourceid=chrome&ie=UTF-8&q=kentucky+swimholes

http://www.swimmingholes.org/ky.html

http://www.swimmingholes.org/ky.html#RED RIVER AREA

http://www.swimmingholes.org/related.html

http://www.backcountrysecrets.com/outdoor-sport/15/places-to-swim-and-swimming-holes.aspx

http://www.backcountrysecrets.com/point/583/4and12-Mile-Rd.-S.R.1997-Campbell-Co.-Ky.-Kentucky.aspx

http://www.backcountrysecrets.com/point/738/Devil's-Hollow-Kentucky.aspx

http://www.getoutzine.com/node/392

http://www.tripadvisor.com/ShowTopic-g143043-i2591-k3590139-Swimming_Holes_places_to_jump_in_water_in_KY-Mammoth_Cave_National_Park_Kentucky.html

Fort Boonesborough

http://parks.ky.gov/findparks/recparks/fb/

http://www.pickatrail.com/sun/c/america/cumberland_gap_national_historical_park.html

http://www.pickatrail.com/sun/k/america/trail/kentucky.html

http://www.pickatrail.com/sun/k/america/camping/kentucky.html

http://www.reserveamerica.com/camping/Fort_Boonesborough_State_Park/r/campgroundDetails.do?contractCode=KY&parkId=91810

http://www.reserveamerica.com/camping/map_of_Fort_Boonesborough_State_Park/r/generateBrowseMap.do?topTabIndex=CampgroundMap&map=PARK&parkId=91810&contractCode=KY&drivingDirections=true#dirnAnchor

http://www.google.com/search?q=ky+waterfalls&hl=en&prmd=ivnscm&tbm=isch&tbo=u&source=univ&sa=X&ei=6-CfTdvoA8O1tgfp47iTAw&ved=0CGkQsAQ&biw=1024&bih=653

http://www.gowaterfalling.com/waterfalls/maps/statekentucky.shtml

http://www.kentuckytourism.com/things_to_do/attractions/natural_attractions.aspx

Harrodsburg ky and the shaker village

http://www.harrodsburgky.com/visitors.htm

http://www.shakervillageky.org/directions/
http://www.shakervillageky.org/recreation/
http://www.shakervillageky.org/recreation/hiking_biking/
http://www.shakervillageky.org/i/downloads/bicycle_routes.pdf
http://www.shakervillageky.org/i/downloads/Trails_of_SV.pdf

Wednesday, April 6, 2011

hILLSIDE gARAGE

http://www.cadsmith.com/garage_plans/hill_side/g2-hill.htm

hill side garage
Traditional 2 car garage, 24' x 26', rear access to 2nd floor loft space.

~ Build into a hill with full foundation in rear ~
The 3' side access door is optional, front dormer is also optional. 

Over All Dimensions = 24' x 26' 

Conventional Framing
1st Floor garage space = 624 sq. ft.
2nd Floor Living Space =537 sq. ft.
1st Floor Slab to Ridge = 22'-11"
2nd Floor to Ridge = 12'-7"
Price Code = H
hillside garage
Uphill, rear access to second floor office or shop space.
Two overhead doors are 9'-0"; wide x 8'-0" high, Conventional framing.
Plan is Price Code H
See: Order Form for ordering information
hill side garage


Cabana

Front View

http://justgarageplans.com/3516/plan-detail/10-152.php

Floor Plan

Pool house

http://justgarageplans.com/3514/plan-detail/10-150.php


Front View


Floor Plan

hop

Pottery Barn Kids Easter Event Recap…Hop to it!

March 8, 2011
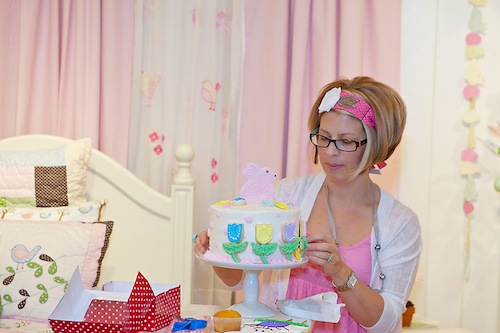
This last weekend, I had the honor and pleasure of teaching a 1-hour class at my local Pottery Barn Kids on behalf of Project Nursery.

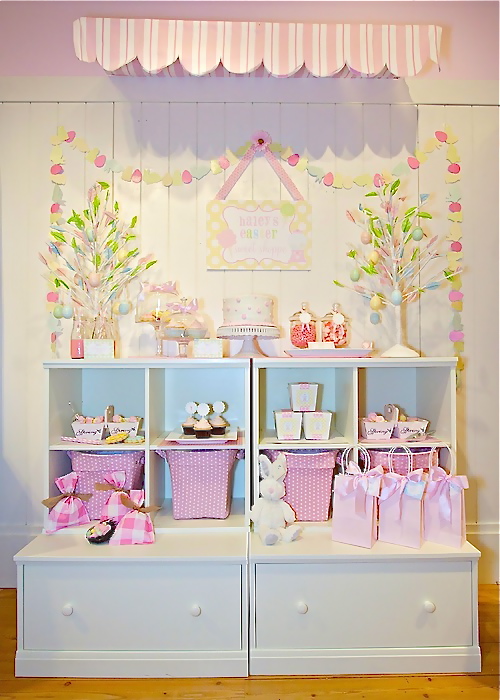
This was such an exciting event and the turnout was amazing!  The focus of the class was on Easter decorating and entertaining.  We all know that Pottery Barn Kids offers some of the best seasonal decor and entertaining products. What better way to teach the attendees how to incorporate and showcase these items into a complete DIY holiday party table scape. I also emphasized the importance of re-purposing these items so that they can be enjoyed throughout your home.
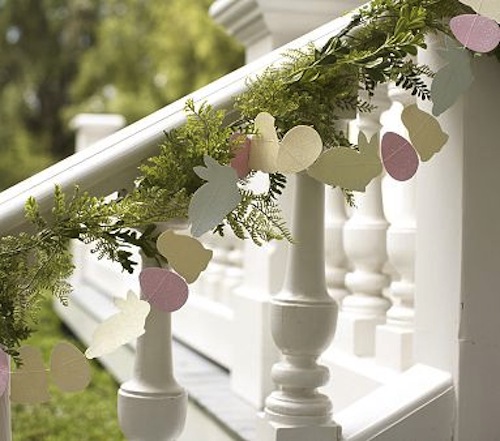
Take this adorable Easter Glitter Garland. My first instinct is “Ah…a party!”, but let’s take it one step further.  How about using it across a fireplace mantle for some added festive decor in the main living space, or what about draping it on top of your kiddos window treatment?  Also, it is great for a little party embellishment, and when the party is over…bring it into the playroom, string it across an art board  for the kids to enjoy through the holiday.
Other fun and festive items are these adorable Peter Rabbit™ Melamine Plates. Set the kids table for Easter brunch or use them throughout the month for daily use. The kids will LOVE having their very own themed dishes!
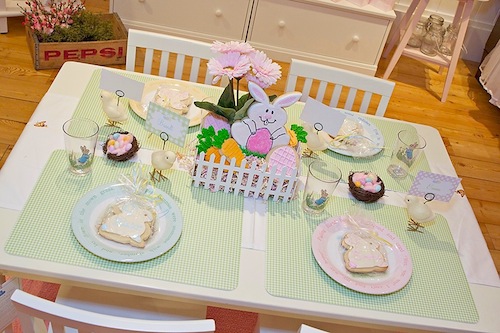
Here is how we set the kids table along with a super simple DIY centerpiece:
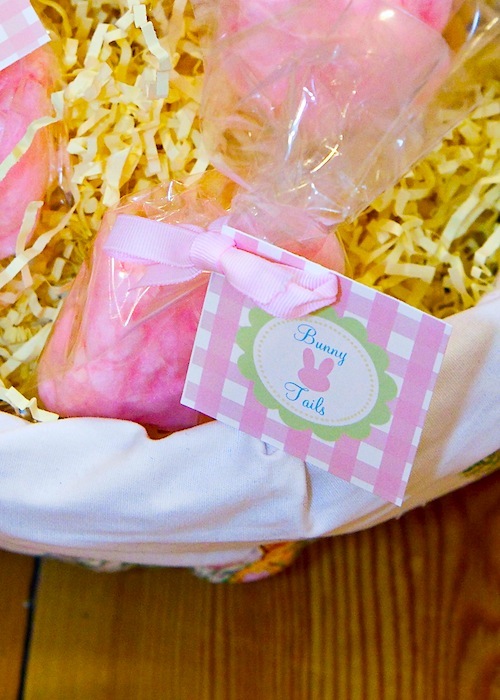
We also added in some adorable personalized fondant covered bunny cookies as favors / place settings.  The centerpiece “garden” was created as a quick and easy DIY project using some craft wood pieces, a foam block, shredded paper, faux florals and decorated cookies.  Totally cute and edible!  On the table were mini birds nests filled with cotton candy and topped with colorful, festive jelly beans. This is another quick and easy way to add a little color into your table. Attendees were also shown a few simple tips to serve up some fabulously festive DIY treats for your guests.
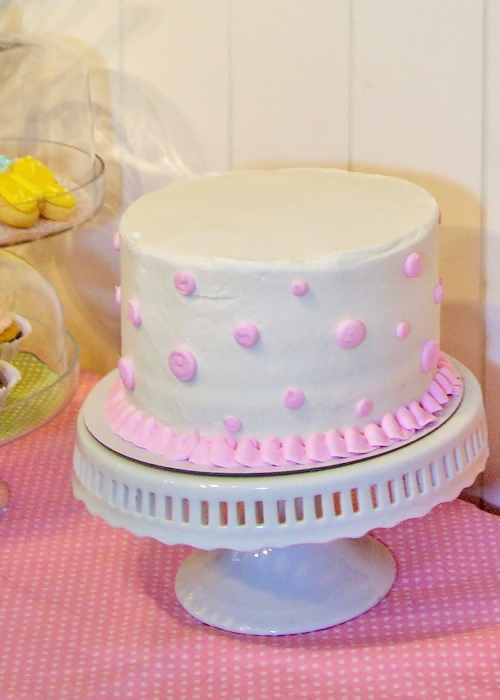
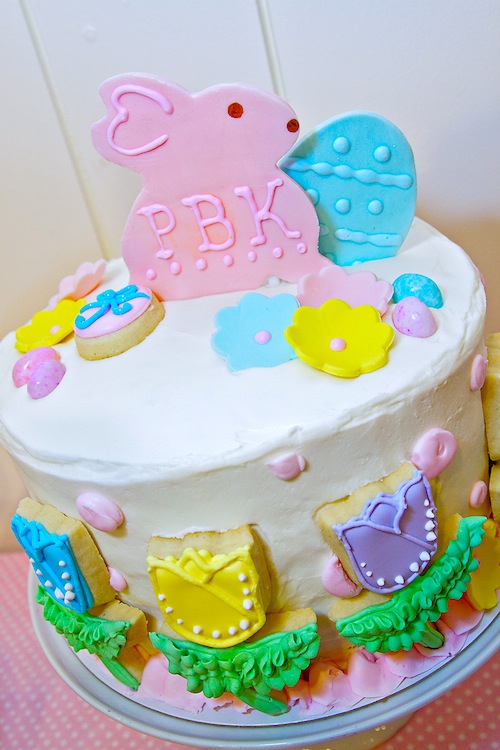
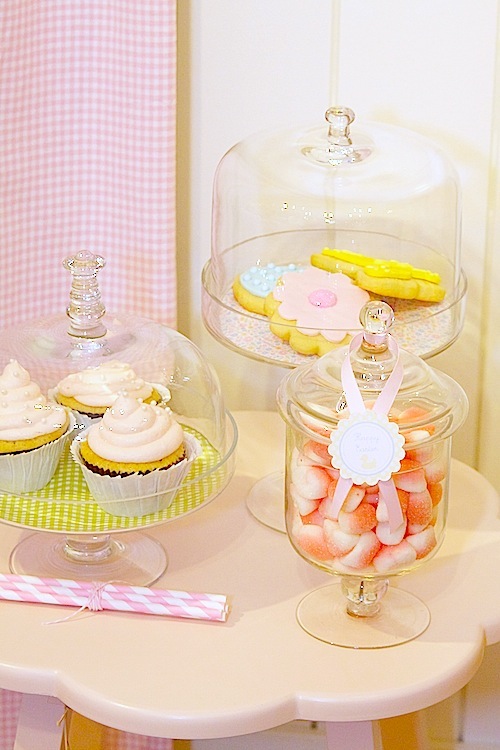
Take this cake from the bakery at Target…Add on a few adorable fondant shapes along with some decorated sugar cookies, put atop this great cake stand from Pottery Barn and ta-dah a fabulous professional looking cake for less!
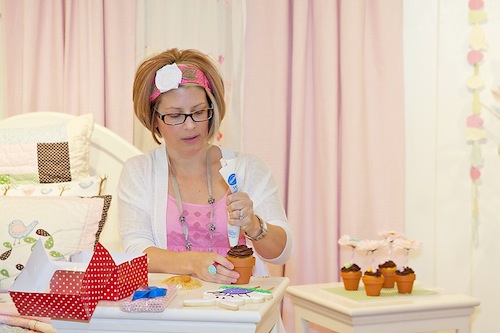
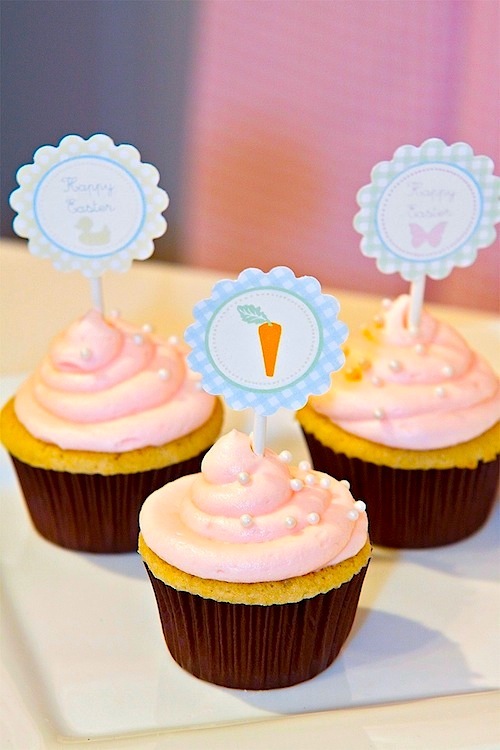
In keeping with the Easter / Garden theme we also made these adorable “potted cupcakes”,  another super simple DIY project to WOW your guests.  Make these by taking miniature terracotta flower pots lined with foil, pop in a cupcake, frost, sprinkle with crushed oreos, insert decorative paper straw, top with faux floral and mini decorated sugar cookies.  So simple the kids could participate too.
I am in love with these Easter Baskets with liners from PBK…great for passing out treats or party favors.  And when the party is over, get these baskets ready for your Easter egg hunt!
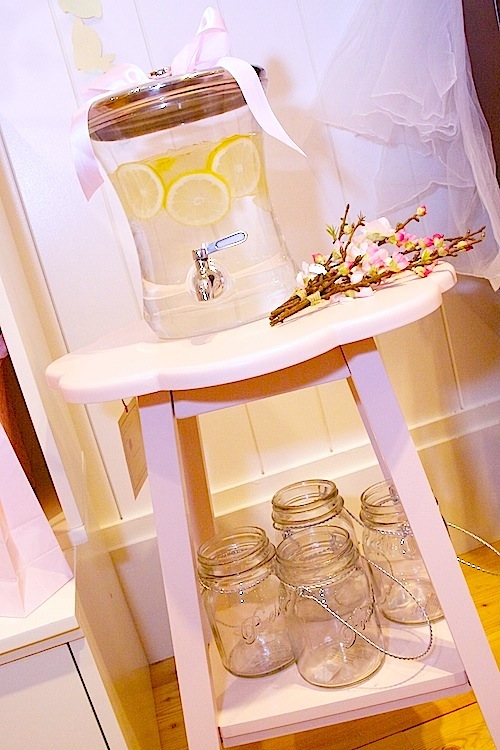
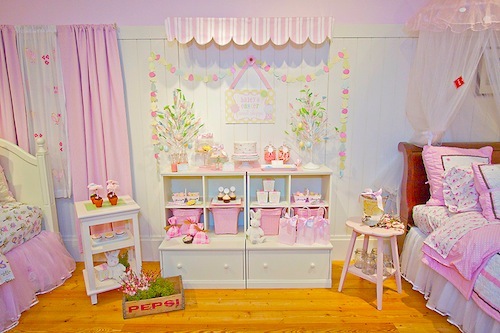
Go ahead grab your daughter’s side table out of her bedroom and repurpose it for a kid-sized beverage station just  like the one pictured here…totally crushing on this precious Flower Accent Table by Pottery Barn Kids.
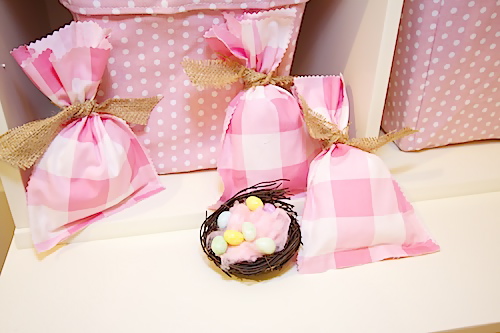
Guests were shown how to create this super sweet treat bag…it is as simple as hot glue, pinking shears, fabric and burlap.
What party would be complete without the sweets?  Here are some fun ways to serve up delightful goodies!
Aren’t you just lovin’ the striped awning?  Me too.  That  is why I pulled it out of their back room and guess what?  It was part on an old display.  Good news is, they shared a little secret with me. It is a shower curtain that they turned into this perfect prop, NO sewing involved – my kind of DIY project! And finally, guests were given a sheet of Easter printables designed specially for Pottery Barn Kids and Project Nursery by Fresh Chick Design Studio…which you can have too by clicking this LINK!!
This event was so much fun, the staff at Pottery Barn Kids were amazing and a pleasure to work with! A special “THANK YOU” to all of the wonderful talent that helped make this event a success!
Apple Velvet Photography – Photography
Scrumptious Swirls – Fondant Cake Toppers and Cookies
Modern Cupcake – Cupcakes
Two Sugar Babies – Fondant Cupcake Toppers
Casey’s Confections – Decorated Sugar Cookies